 Deutsch
  España
  Francais
  Polish
  Russian
  Čeština
  Greek
Greek  Lithuania
  Romanian
  Arabic
  Português
  Indonesian
  Croatian
  Serbia
  Farsi
Farsi  Hebrew
  Mongolian
  Bulgarian
  Georgia
  Azerbaijani
  Thai
Thai  Turkish
  Magyar
 How EduPage grades paper tests for you


EduPage can automatically evaluate traditional paper tests as well. Simply take a photo of them, upload them to the app, and the system will automatically recognize the answers, assign the papers to individual students, and evaluate the tests for you.
How does the whole process work?
- Prepare your test or quiz in EduPage in the usual way. Printed tests
- Assign it to students as a Print Test. Assigning a "Print Test"
- Then print it out and let students complete it in the traditional paper form.
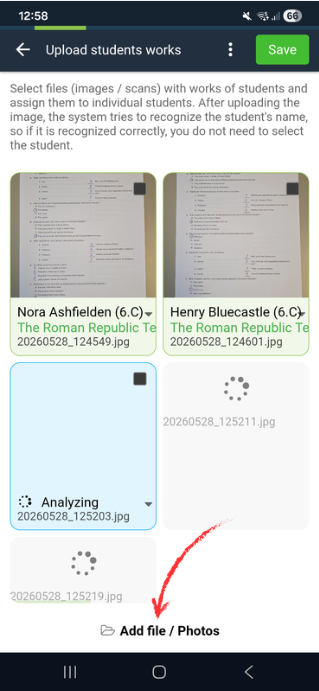
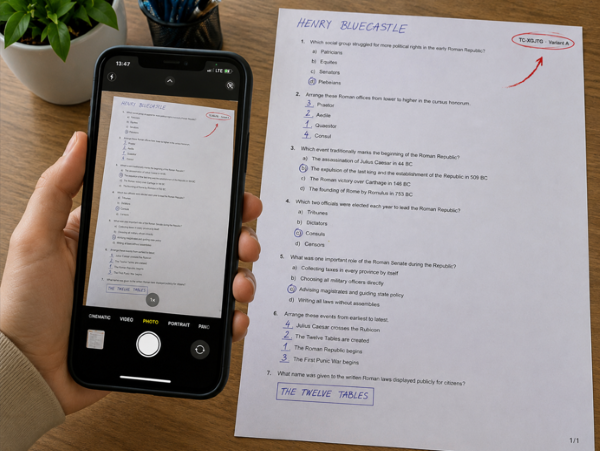
- After the test, take photos of the papers or scan them. A regular photo taken with a phone is completely sufficient.
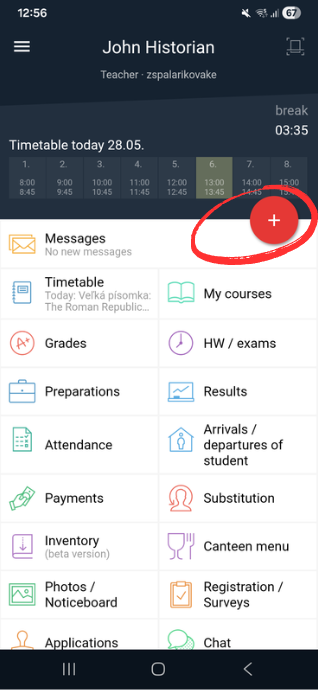
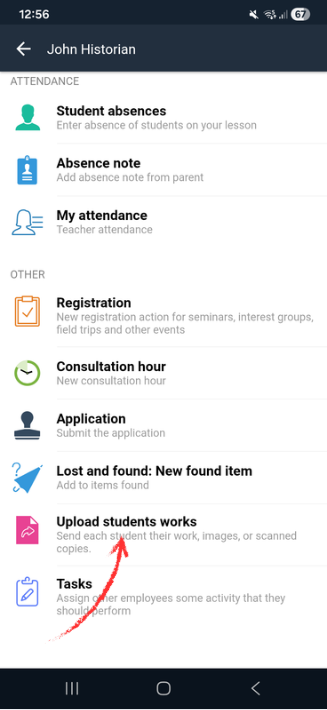
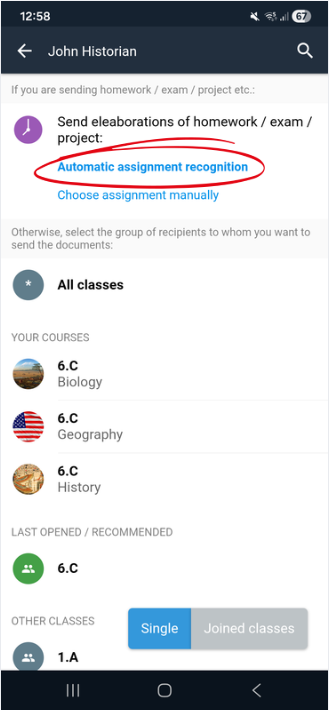
- In the app, tap +, select Upload Students’ Papers, and choose Automatic Task Recognition.
- EduPage automatically recognizes which test it is, the student’s name, and even the test version if you used multiple variants.
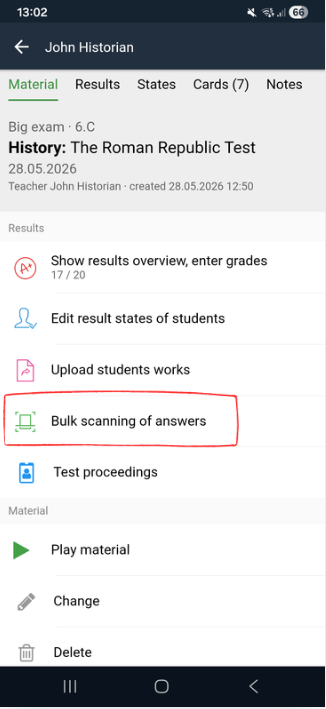
- Save the uploaded papers and start Bulk Answer Scanning.
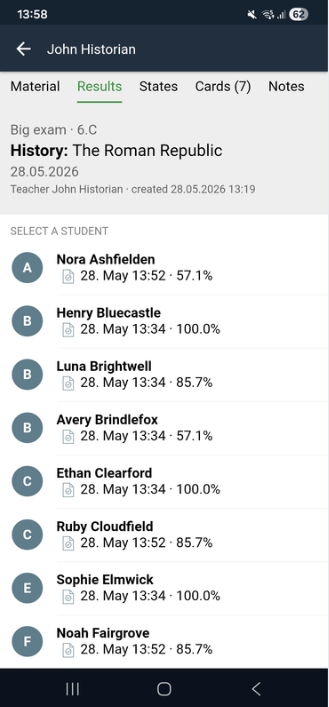
Done — the test is graded. You can send the results to students and record them in the grade book.
FAQ
What if the AI makes a mistake?
Such situations can happen, but in practice they are quite rare. For standard answers, EduPage works very reliably and can sometimes recognize less readable handwriting even better than a teacher correcting dozens of tests manually after a long day.
Another advantage is that once the results are published, students can see both the questions and their own answers. If something seems incorrect, they can point it out to the teacher. Typical cases include situations where a student writes the answer in another part of the paper or marks it in an unusual way.
I still want to check the tests myself as a teacher
That is not a problem at all. EduPage actually makes this process much easier.
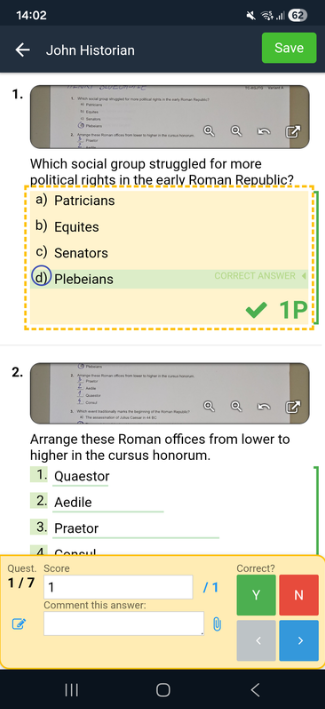
For each question, you can see the scanned student answer together with the correct solution. If anything needs adjustment, you can easily edit the answer or the scoring manually.
In the overview, you can also see all incorrect or unanswered responses. Simply click on a specific question and you immediately have everything needed for a quick review.
I have a multi-page test
EduPage can also work with multi-page tests.
The important thing is to upload the pages in the correct order. Once the system recognizes the student’s name on the first page, the remaining pages are automatically assigned to that student’s work.
Of course, you can also assign the student manually if needed.
For the simplest processing, however, we recommend shorter single-page tests. The entire upload and processing workflow will then be clearer and easier to manage.
EduPage did not recognize the test
The test number and variant are located in the top-right corner of the paper. If this corner is missing in the photo, the system may not recognize the test correctly.
Even in such cases, you can manually specify which test and variant it is. For easier recognition, we therefore recommend photographing the entire sheet, including the top corner.
I do not want to publish the tests to students because I want to reuse them next year
Some teachers prefer to keep their tests private so they can reuse them the following year. In practice, however, students often gain access to the questions anyway. It is also beneficial for students to understand where they made mistakes.
A more practical solution is to let EduPage AI generate new questions for you. This way, every year you can have an original version of the test without needing to create a completely new one from scratch or search for tests from various sources.
The feature is also available on the web. You can find the guide for working in the web interface here: Grading Paper Tests Using EduPage (Web Interface)
See also:
How to Create a Test Using EduPage AI?
Versions of printed tests